Photography is an artistic expression. Numerous people will go through hours in exhibition halls or displays investigating a photo to comprehend its importance.
There’s numerous strategies an eager picture taker can figure out how to utilize counterfeit lighting. Fake lighting isn’t not difficult to utilize like daylight, yet you can utilize it in approaches to make some genuinely astonishing pictures once you know how.
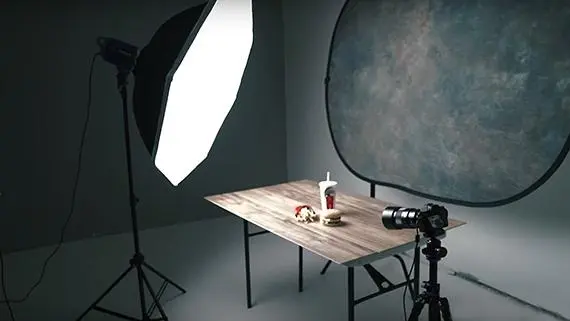
Indoor (fake) lighting frequently comes in the types of one or the other fluorescent or tungsten lights. Tungsten bulbs are frequently utilized by experts, and are alluded to in the business as “hot lights”, that is a direct result of the great temperatures they produce in the wake of being utilized for quite a while. In the photography calling it’s vital to comprehend the tones they can deliver, frequently at various temperatures. For instance, a hot light will assuredly deliver more red and less of blue. Additionally flame lights and chimneys can be utilized inside to make shadows and profundity.
At the point when you utilize indoor/fake lights, you will likewise have to have a comprehension of openness. At the point when you have less light to work with it will frequently take more time to open your film to catch your image.
We should discuss taking pictures in a dim climate briefly. Suppose you’re in a dim room where you may have direct light on the item however you’re remaining behind glass, you would not have any desire to utilize your glimmer, as your blaze would skip the light back at the image you’ve taken. Along these lines, to fix this you would get as near the article as could be expected. Another thought to consider is the point where you snap the photo.
Snapping the photo straightforwardly before the item could bob the light and shadows around. You would have to point your camera aside or sometimes up straightforwardly from the beginning have a superior possibility of taking a decent picture. On the off chance that you don’t have glass to fight with I would say that the point would in any case be a significant factor, particularly when taking representation pictures. Shooting any subject head on is probably going to make shadows and not give the quality you would require for a great print.
When shooting faces or different items you’d in a perfect world need a three dimensional difference. You should look for the edges and shapes of the subject. The edges and forms will assist you with knowing the right point you would have to shoot the subject from. Any shadows will frequently give the three dimensional difference you’re searching for.
Inside lighting should be moveable, as turning on a room light is simply not going to cut it, and will frequently give you something contrary to what you want. One stunt you can utilize is to utilize a mount, and afterward you’re ready to change the point as you need it.
Counterfeit light unquestionably enjoys some upper hands over open air/common light, however I frequently find that my own photos come out better with normal open air light. In any case, that is me and it generally will rely upon your own inclinations of that of your customer or subject the best thing to so is consistently pick your lighting settings as indicated by what your shooting and it will make your image as normal as could be expected.
Learning and trying different things with various lighting will build your photography abilities ten times. You can generally ask an expert for tips or maybe purchase books regarding this matter. The more you attempt it, the speedier you will make the ideal effort later on.
What encounters have you had with the different lighting that have been talked about here? I’d prefer to hear your encounters or any tips you may have. Leave a remark beneath.